Efficiency is the key to success in customer support, and finding ways to streamline workflows can make a significant impact. In this article, we'll explore a custom solution to enhance the Zoho Desk and Zoho CRM integration using workflows and the Zoho Desk API. Specifically, we'll focus on leveraging this integration to display Zoho CRM information with Zoho Desk ticket comments, providing agents with instant access to critical data.
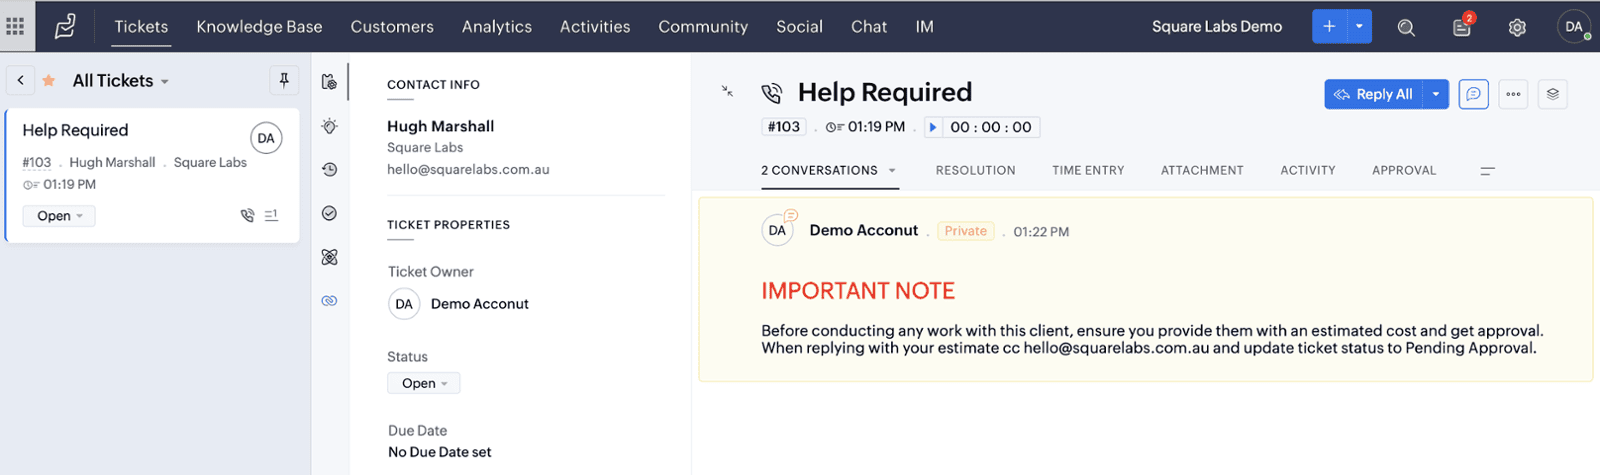
By utilising custom workflows and the Zoho Desk API, you can create a process that automatically pulls and displays pertinent Account, Contact, or Custom Module data from Zoho CRM directly into ticket as a comment. This ensures that Desk agents have immediate access to the information they need without navigating between different systems or performing manual searches.
Zoho CRM > Zoho Desk Native Integration
We need to set this up as it will create the link between the records by storing the Zoho CRM Contact and Account record ID on the Zoho Desk Contact and Account.
Head to Settings > Settings > Marketplace > Zoho
- Click Zoho CRM
- Click Integrate
- Click Authorise
- Select your sync type
- Map your Account and Contact fields
- Click Start Sync
- You can modify your sync preferences here further if required
Connections
As apart of this automation we will be getting information from Zoho CRM and then displaying it via the Zoho Desk API. We will need 2 connections for this, of course you can put them into a single connection if you prefer, I just opt to keep my connections seperate for each application.
Connection Names and Scopes
- crm_connection
- ZohoCRM.modules.ALL
- desk_connection
- Desk.tickets.UPDATE
Head to Settings > Developer Space > Connections
- Click Create Connection
- Select Zoho OAuth
- Enter a Connection Name
- Select the required scopes (listed above).
- Click Create and Connect
- Click Connect
- Select your Production System
- Click Accept
Functions
We will be creating a functions for this automation and the code is provided below.
You will also need to retrieve your orgId which is located at the bottom of the page here: Settings > Developer Space > API
To create a function go to Settings > Developer Space > Functions
- Click New Function
- Enter a Function Name (No Spaces)
- Set the Category to Automation
- Set Module to Tickets
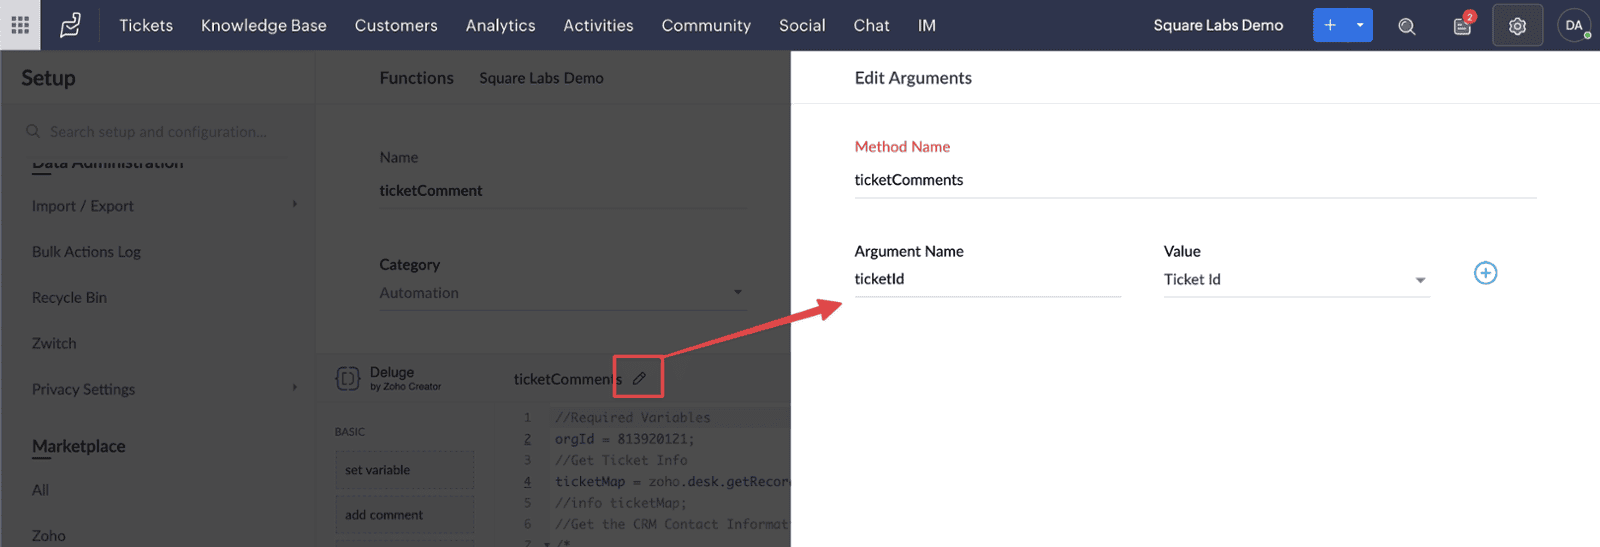
- Enter code below
- Update the tickets arguments and set ticketId to Ticket ID
- Click Save
Inside our code example we are returning the field 'Important Account Note' but you can modify the code to get other data from your system that you want to display.
Workflow
We are now ready to associate the new function to a workflow.
Head to Settings > Automation > Workflows
- Click Create Rule
- Enter a Rule Name
- Click Next
- Check the Create checkbox for Execute On
- Click Next
- Enter conditions if you need.
- Click Next
- Under Actions click the '+' Button
- Scroll Down to Custom Functions and select Existing
- Select the Function you created before
- Click Save
That completes this small but powerful customisation, hopefully that helps boost your agent productivity, streamline operations, and deliver exceptional customer experiences.
Need Help? Contact us!
Resources
- GitHub Code: https://github.com/squarelabsgit/Display-Zoho-CRM-Information-with-Zoho-Desk-Ticket-Comments
- Zoho Desk API Documentation: https://desk.zoho.com/DeskAPIDocument#TicketsComments